Hello! Gonna detract from my Doppelganger posts to provide a quick tutorial for a friend who wants to learn Ren’py. I won’t be going into detail, because this is for someone who has never done CS.
Setting up the Game
First, create a new project in Ren’py once you have everything set up. Follow the instructions to install Editra, which is the most user-friendly IDE that Ren’py offers automatically. Setting the game directory is very important as well, because it will allow you to add images to the game. To change where Ren’Py creates game directories, click “preferences” button at the bottom right of the Ren’py screen .

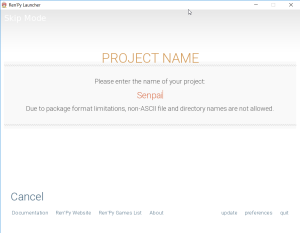
Once you’re done setting up the directory, go back to the main Ren’py screen and create a new project. There’s no button to confirm the name, just click “Enter” and follow the other self-explanatory instructions.
On the main Ren’Py screen, open up the file labelled “options.rpy”. This is the file that will, un-surprisingly, edit the options of the game, such as the resolution, which is what we’re interested in right now.
The default resolution is 800×600, which is pretty low to me. I’ve changed it to 1280×720, but it can pretty much be whatever. Just remember it for backgrounds and stuff.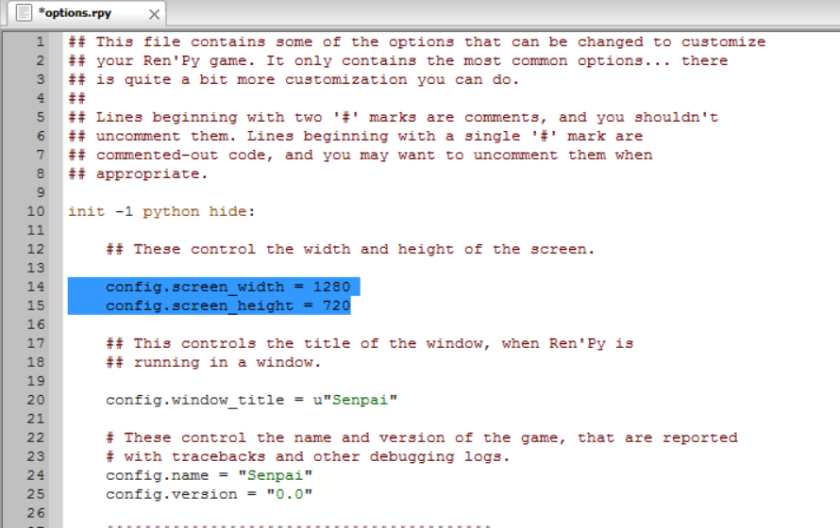
Alright! Now, it’s time to pull out your drawing tablet (or your mouse, you know, whatever floats your boat) and get some basic art done. For this example, I’ll be using art from Doppelganger, which already fits the screen resolution. You can download the basic background and characters here to play with.
Holly Sprites (Angry, normal, sad), Tristan Sprites (Normal, Angry)
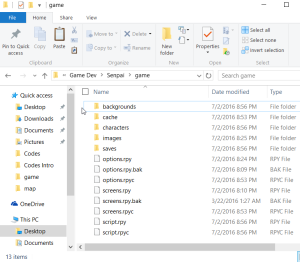
Make sure that you copy and paste ALL of these images into the game folder. This should be in directory of where you created the project. I like to organize my images into folders in the game directory. Note that I didn’t put the image folders into the folder labelled ‘images’, which will play a role in how I find my images in the code later.
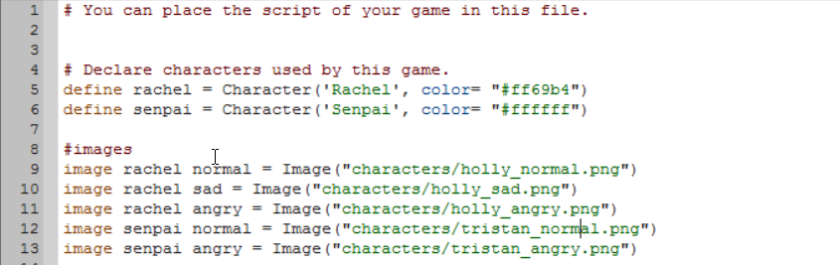
Now, you have to initialize all these variables in the script. Open up “script.rpy”. Define your characters for easy access later. You don’t have to, but it sure as hell is easier than writing it out each time. Use a hexadecimal color picker for the character’s color. This is the color that will show up as the player’s name.
# Declare characters used by this game.
define rachel = Character('Rachel', color="#ff69b4")
define senpai = Character('Senpai', color="#ffffff")
Note that in Python, “#” is used to comment out lines. This means that the line does not affect the code in any way and is there as a “comment”.
Now it’s time to initialize the different expressions and states of the characters. You declare an image variable by using this format:
image character expression = Image("image directory")
for example:
image holly normal = Image("characters\holly_normal.png")
Note that because I put the images into folders, I need to tell the game which folder it is in. The game automatically looks at the “game” folder as the directory, in which two more folders called “characters” and “backgrounds” are in. Finish that for all the character states and your script should be looking something like this.
Now, initialize the backgrounds using the same format. The final initialization of all variables should be done.
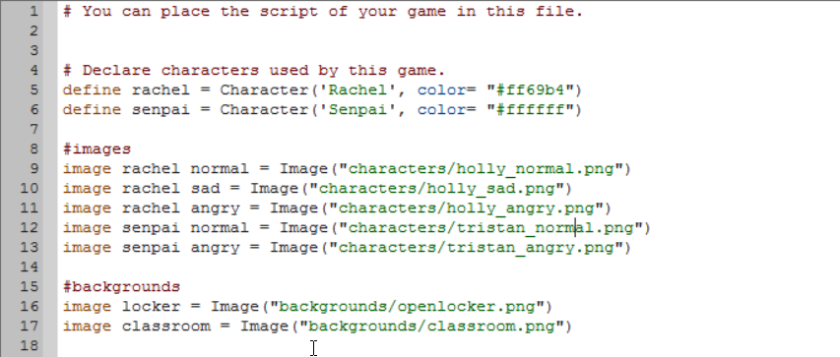
You are now ready to code!
Basic Script and Menu Functions
Great, you have some variables. Now it’s time to do stuff with them. Ren’py should’ve already made a label (can be thought of as a method) called start. For future reference, these labels can take in parameters just like a normal method, albeit it’s kind of different from other languages like Java. This “start” label is where the game will start (no, really??).
First, declare the background using
scene background with transition
Let’s start off in the classroom, with a nice fade. You can change the length of the transitions using code, but let’s not get into that for now.
scene classroom with fade
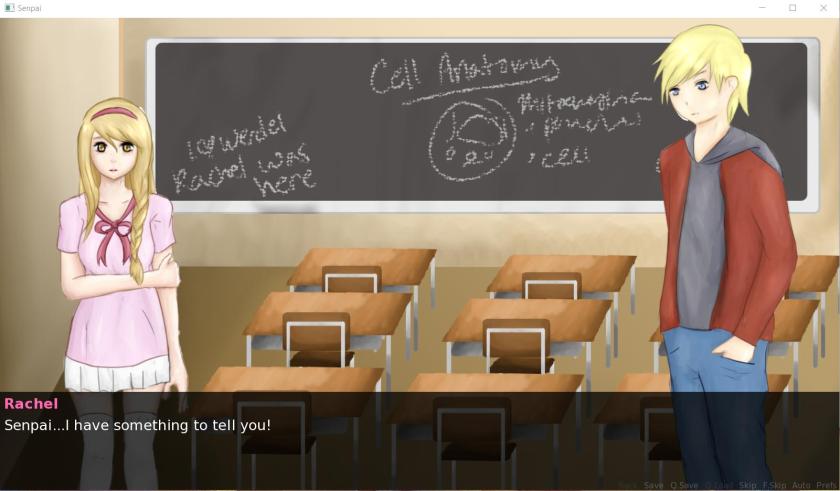
Now, let’s have “Rachel”, our main character, confess her love to “Senpai”. We can just use the characters that we so smartly declared in the first step to do this, and it should follow all the properties you’ve given it.
You can show the character images the same way. There are 3 basic positions: center, left, and right. You can initialize your own positions later as well, so don’t think Ren’Py is that nonversatile.
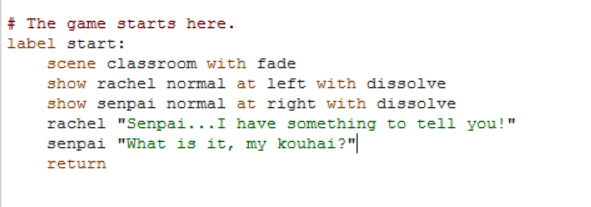
Save the files, and click Launch Project. You should have a cute little confession scene going on.
Now, let’s give Rachel some choices on how to confess her love using a menu. Let’s go ahead and give our game a “good’ and a “bad” ending, so we have to give it some type of conditional. Let’s make a “lovepoint” system in which different choices will affect your score.
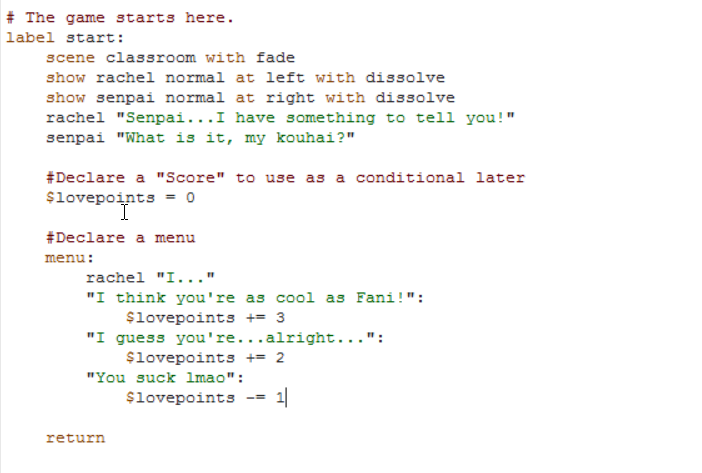
Use the “$” key to declare a Python variable. Python is dynamic type unlike Java, so you don’t have to specify what type of data it is. Notice how I specified Rachel to start a sentence, and for the user to finish it. Their decision affects their ending.
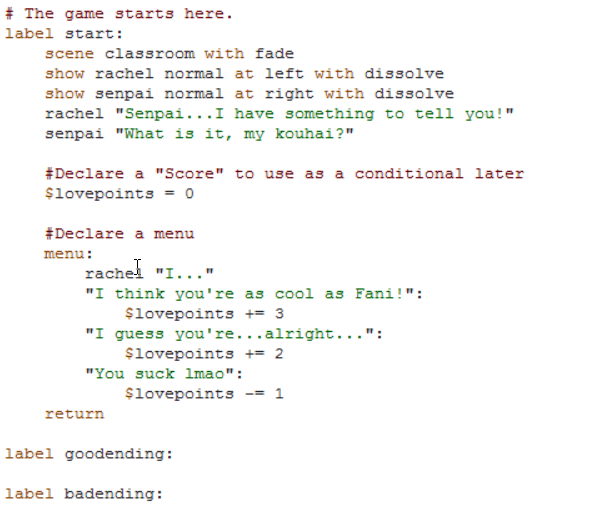
Now, we would need to make these endings using new labels (once again, think of them as methods). Let’s have a “goodending” and a “badending” label.
Now that you have the labels, you have to put stuff into them, obviously. Let’s have the couple move to the lockers for more privacy.

Alright! We have our endings. Now, how do we access them? Let’s jump back to the start label and use the lovepoints as a conditional if statement.
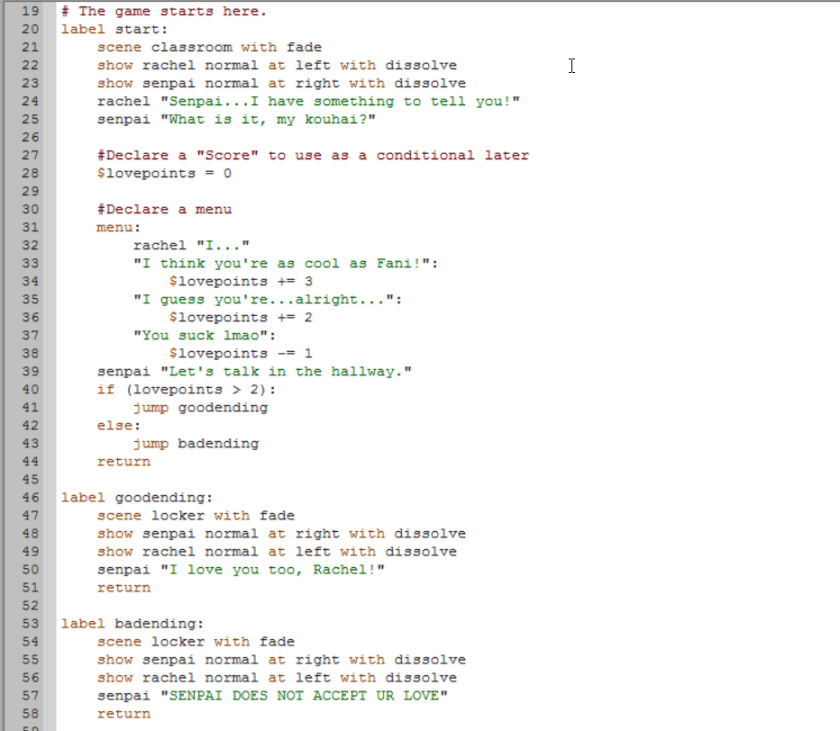
Notice how I had Senpai respond to Rachel, because it would be awkward to just move scenes. Make sure that once you’re done writing the menu, you tab back to the correct indentation or it will show up in the menu instead of the main script.
“jump” is a very important function, and it does exactly what you think it does: it causes the game to go to that label.
Anyways, this tutorial should be enough to cover a basic linear game! I’ll make another one on screens and buttons later.
**Something I forgot to mention! You can just change expressions of the character without re-specifying their location. For example:
show senpai normal at right with dissolve
senpai "How could you do this to me Rachel?"
show senpai angry


")
")
")